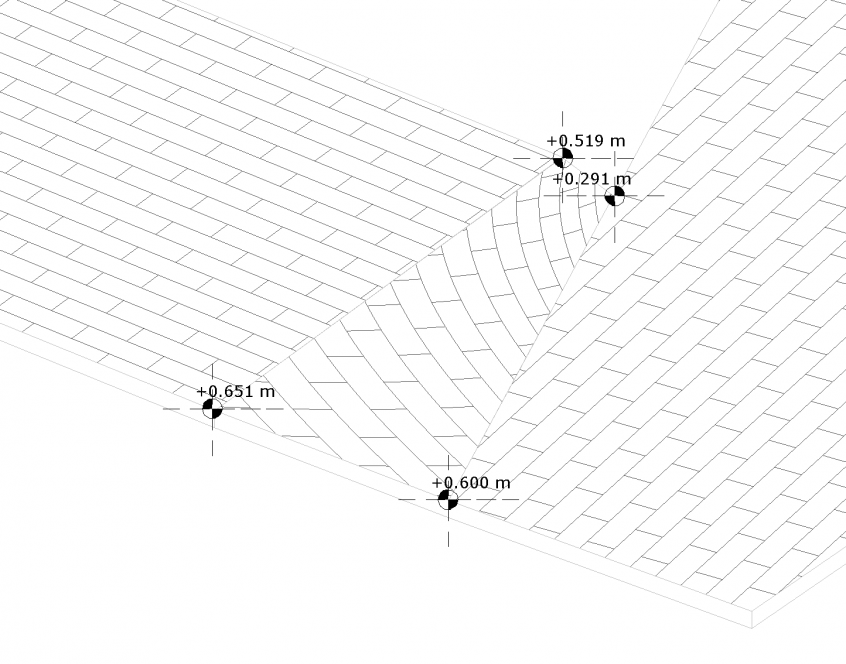
Working with hardscapes or sloped floors it sometimes happens that a model pattern will deform or behave strange in Revit. This is often the result of a curved face. Normal manipulation of model patterns (move, align and rotatable) will only apply for straight planes so to fix this unwanted deformation we need to manipulate surface by height points or sketch of the floor.
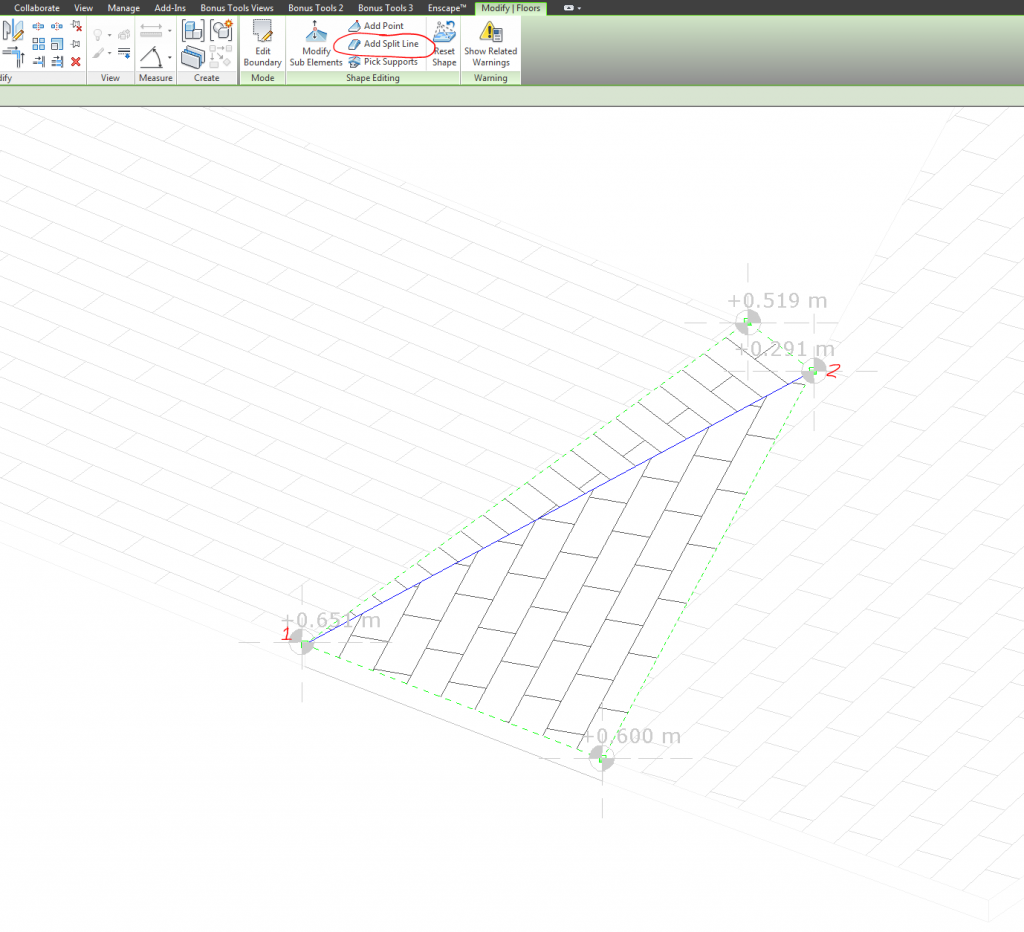
In the case above we need to cut the floor-field in two triangles using the split line (or cut and the floor in two floor-fields, control the height points and join geometry) After adjustment we can start using the align tool to continue to align our rectangular tile pattern the way we want.
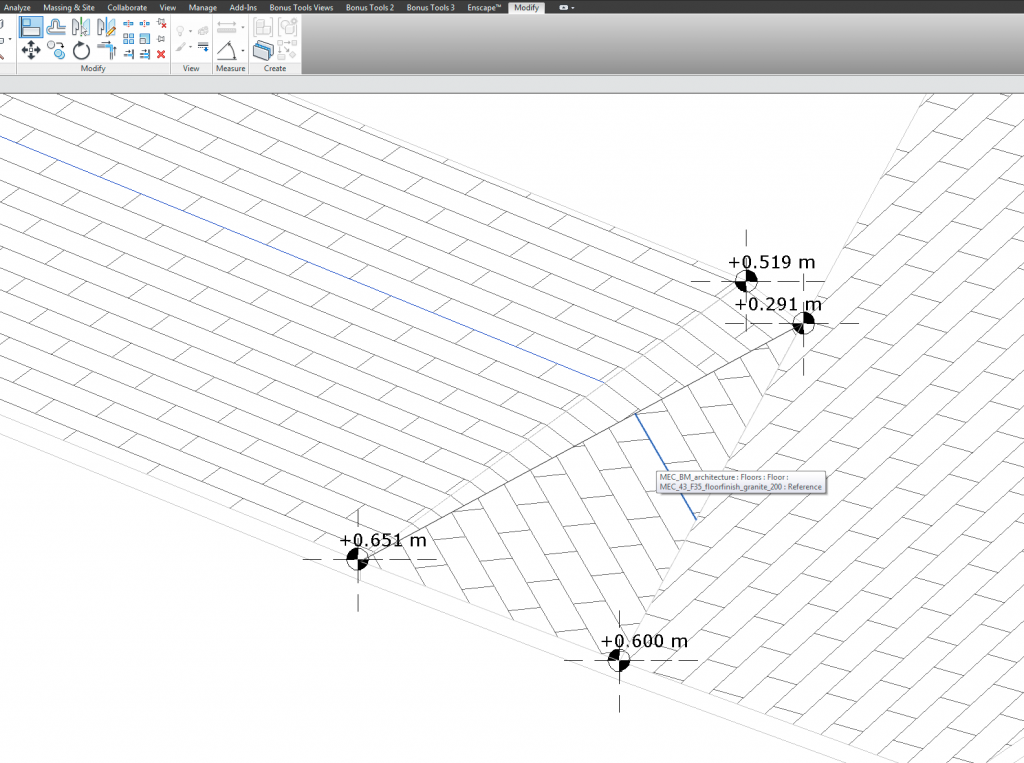
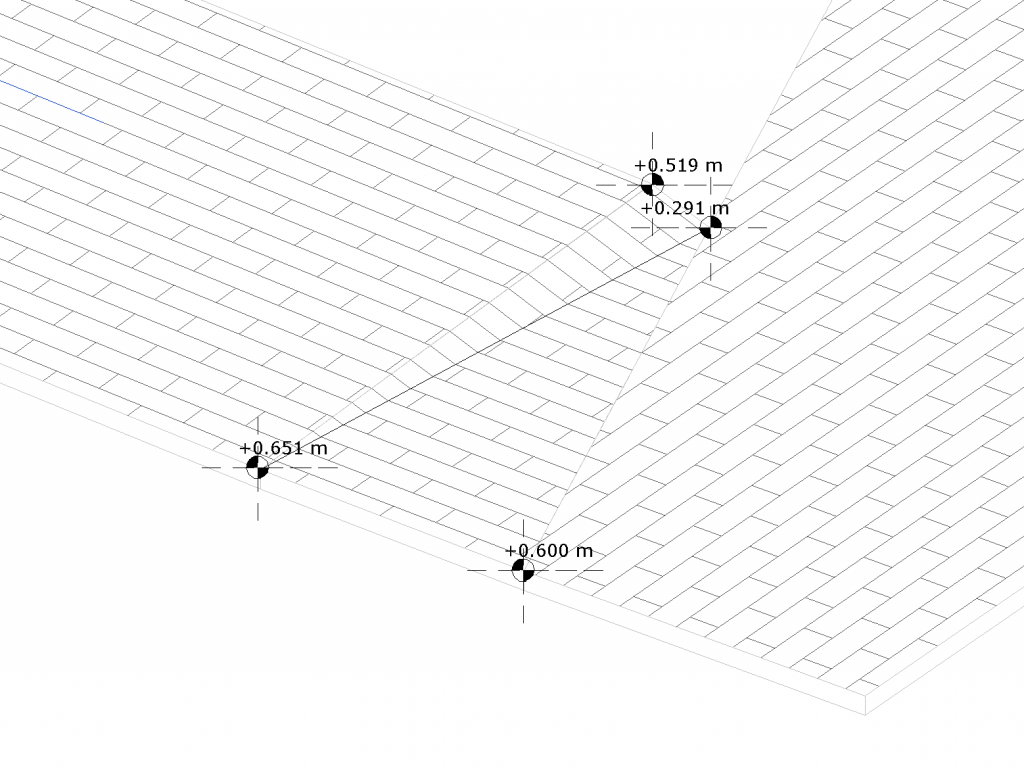
Revit surface patterns can be a great help when working with sloped surfaces or special tiling. I found the best practice for hardscape is to start simple using flat floors and later edit/divide them with height adjustment tools. Remember to check your height adjustments in 3D so you can see any occurring problems and come up with a solution using triangulation or simplification of the surfaces and slopes.